Profile settings
Each user can set their preferences in the Profile settings. Settings are applied per-user basis.
Meaning, the changes you make will affect only you:
- Rearrange items in your sidebar by drag and drop
- Move items you rarely use to the Show more section
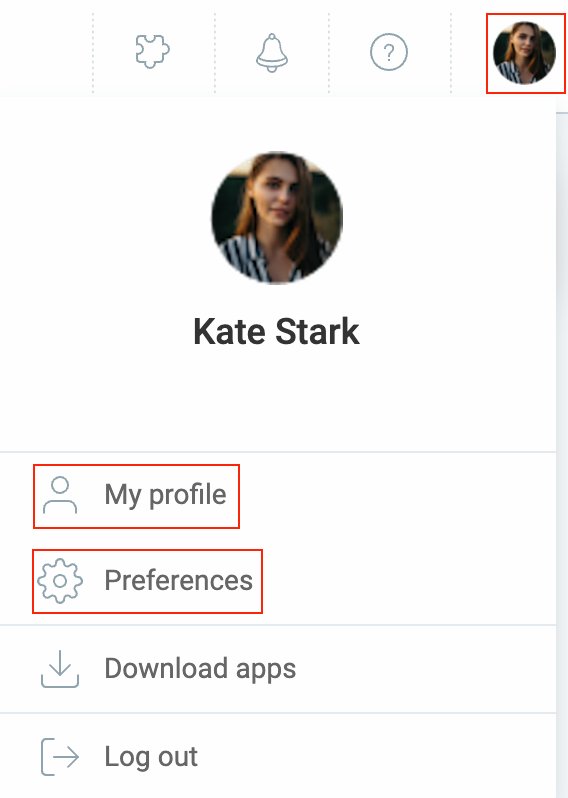
Access Profile settings by clicking on your profile in the upper left corner.
In Profile settings, you can choose to manage:
- My profile
- Preferences
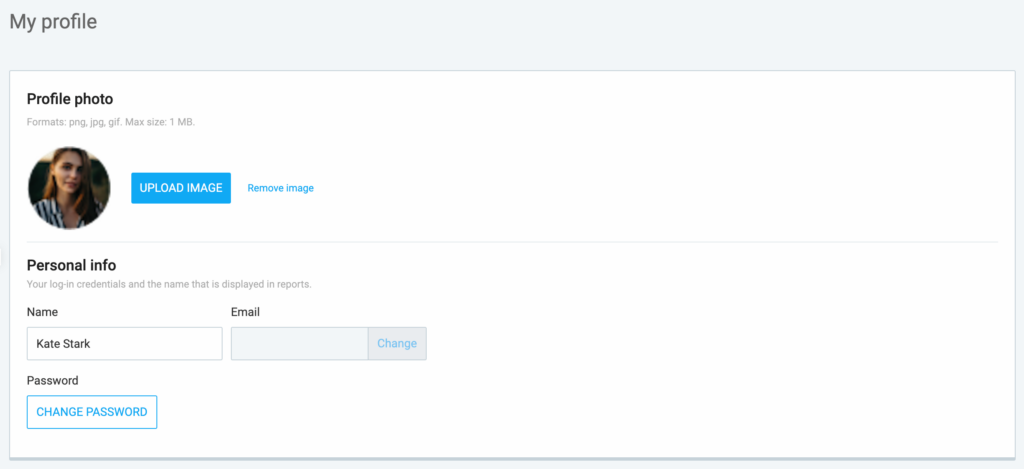
My profile #
Manage your profile settings in the following way:
- Profile photo: Upload or remove your profile picture to personalize your account
- Personal info:
- Change name and email: Update your name and email address as needed
- Change password: Improve your account security by creating a new password. Your password should include a combination of upper and lowercase letters and numbers. Please note that passwords must be between 6 and 50 characters in length.
Preferences #
In this section, you can personalize settings related to your profile information, email notifications, and access more advanced configurations.
Manage your profile preferences in one of the three tabs:
- General
- Email notifications
- Advanced
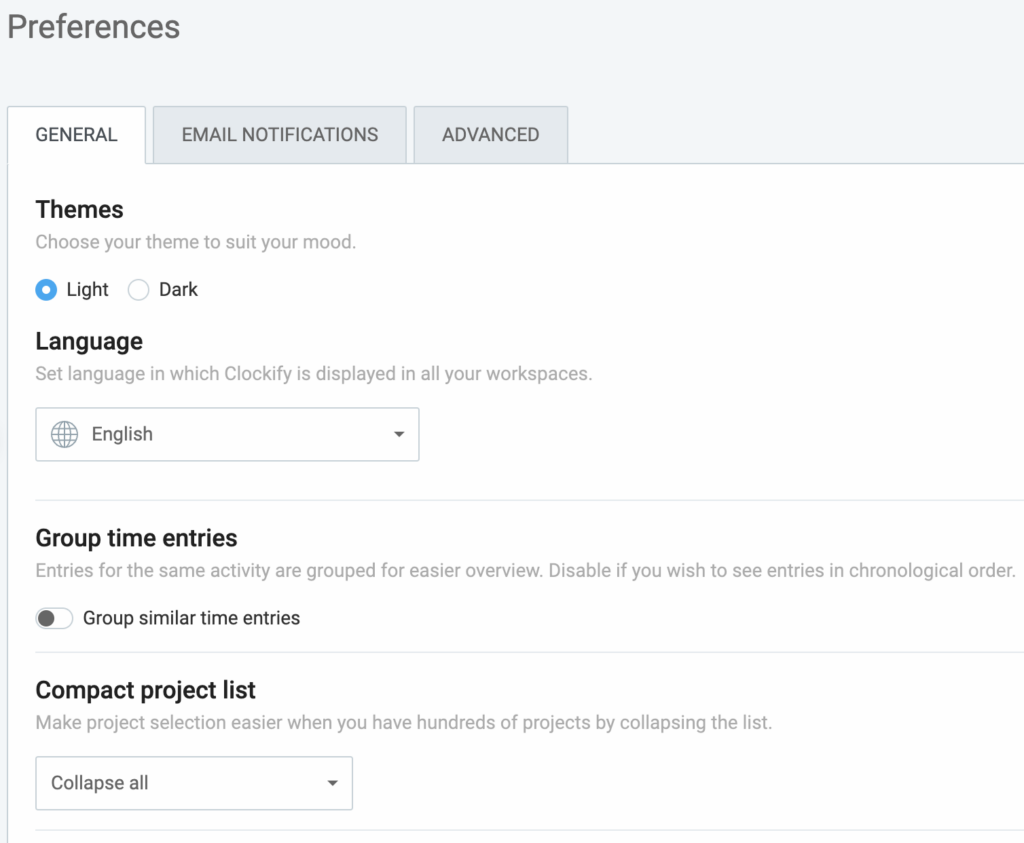
General settings #
Customize how you use the app. You can choose your preferred app theme, change the language, and adjust other settings to make your work easier.
You can modify the following preferences:
- App theme: Easily switch between dark and light themes
- Language: Change the language of the app
- Group time entries: Choose to group similar time entries or keep them separate
- Collapse user list: Opt to make the project list more compact
- Task filter: Activate or deactivate the task filter for better organization
- Time settings: Customize time-related settings like time zone, date format, time format, week start, and day start
Change language #
In addition to English, you can also use Clockify in your native language (French, German, Russian, Spanish, Portuguese, Korean, Japanese). Change the interface language in your Profile settings.
If you invite a new user to your workspace, they’ll inherit your language setting during signup. They can change if they want to.
Desktop and mobile apps take language based on the operating system (profile settings are only applied to the web version).
Apply here and contribute to translating Clockify.
Email notifications #
Control which emails you get from Clockify (newsletter, personal weekly report, and long-running timers) by choosing Email preferences in your Profile settings.
- Newsletter – Receive a monthly email about new features in Clockify
- Onboarding – Receive an email series about key features and activities when joining Clockify
- Weekly report – Receive a weekly email about your time tracking activities
- Long-running timer – Receive an email when a time entry is running more than 8 hours
- Scheduled reports – Receive shared reports you’ve scheduled to email
- Approval – Receive an email when a timesheet is submitted, rejected, withdrawn, or approved
- Time off – Receive an email when balance is updated, or a time off request is submitted, approved, or rejected
- Alerts – Receive an email when a project or task reaches a certain percentage of its estimated time or budget
- Reminders – Receive an email when you or your teammates miss or go over time tracking targets
- Schedule – Receive an email about your scheduled assignments
Clockify may still send you messages regarding your account, required service announcements, legal notifications, and privacy matters.
In order to receive these email notifications, you need to have a verified email and also check which type of notifications you’d like to receive in Email preferences.
You can also unsubscribe from any type of email you receive by clicking Unsubscribe at the bottom of the email.
Advanced settings #
Fine-tune your account in the Advanced settings section for enhanced security and efficiency. Find options like two-factor authentication (2FA), API key management, and webhooks configuration.
2FA #
Enable an extra layer of security by setting up 2FA. This adds an additional verification step when logging in. Each time you log in to Clockify, you’ll need to prove your identity by checking your email for a one-time login code (or a login link).
If a workspace requires 2FA, you’ll be asked to enable 2FA for your personal account and won’t be able to turn it off (as long as you’re part of that workspace).
To activate 2FA, follow these steps:
- Go to Preferences
- Select the Advanced tab
- In the Two-factor authentication section, toggle the switch to enable 2FA
- Confirmation code will be sent to your email
- Enter the code and confirm
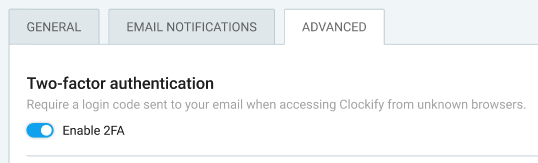
As a result, you’ll need to enter a one-time login code upon logging in to the workspace.
API key #
Generate an API key to securely access and integrate with external applications or services.
- Navigate to Preferences
- Choose Advanced tab
- Find the API key section and click on Generate
- A window for generating the API key will appear
- Click on Generate
- Once the key is generated, close the window

Make sure you copy the key immediately or store it securely. Once the window is closed, the key will not be visible again.
Webhooks #
Create webhooks to receive real-time notifications and data updates.
- Navigate to Preferences
- Choose Advanced tab
- Find the Webhooks section and click on Manage webhooks
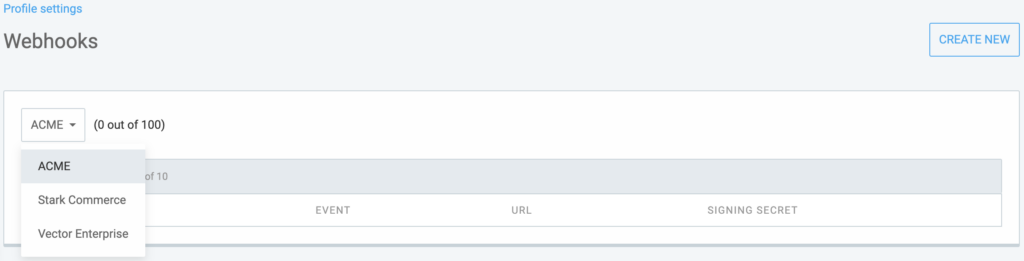
- You’ll jump to the Webhooks page
If you’re a member of multiple workspaces, you can choose the workspace you’d like to create the webhook for.
Follow these steps to set up webhooks:
- Go to Preferences
- Select the Advanced tab
- In the Webhooks section, click on Manage webhooks
- You will be redirected to the Webhooks page
If you are part of multiple workspaces, choose the relevant workspace.
To create a new webhook:
- Click on the Create new button at the top right corner
- In the Create webhook window, provide the following details:

Name: Specify a name for your webhook
Endpoint: Enter the webhook’s endpoint URL
Event: Choose the event that will trigger the webhook - Click on Create to complete the process